
DIY Building your Pond
Welcome to our DIY blog, where we'll guide you through the process of creating a stunning backyard pond and water feature. In this step-by-step guide, we'll cover everything you need to know about installing a pond liner and pond pumps to make your dream water feature come to life. Let's get started!
Materials You'll Need:
- Shovel and digging tools
- Pond liner (flexible rubber liner)
- Sand or old carpet (for padding)
- Pond pump with a suitable filter system
- PVC tubing and connectors
- Stones and rocks for edging and decoration
- Water plants (optional but recommended)
- Waterfall feature (optional)
Step 1: Plan the Size and Shape
Before you start digging, take some time to plan the size and shape of your pond. Consider the available space in your backyard, the landscape, and any existing features like trees or structures. A pond with irregular shapes and varying depths looks more natural, so try to avoid perfect geometric shapes. You can use stakes and a garden hose or a rope to outline the pond's shape and size.
Step 2: Check for Utilities
Before digging, it's crucial to check for any underground utilities in the area where you plan to dig. Contact your local utility companies or use a utility locator service to mark the location of any gas lines, water lines, electrical cables, or sewer lines. This step is essential to avoid any accidents and to ensure you won't damage any essential services.
Step 3: Get the Right Tools
Having the right tools will make the digging process much smoother. You'll need a shovel, a spade, a digging bar, and a wheelbarrow to remove excess soil from the hole. Depending on the size and depth of your pond, you may also consider renting a small excavator for larger projects.
Step 4: Excavate the Pond
Start digging from the center of the pond and work your way outwards. Begin by removing the top layer of grass or vegetation. Dig down a few inches to reach the soil, and use a spade to make clean cuts along the pond's perimeter.
As you dig, keep the soil nearby; you may need it later to build up the edges of the pond. Create a ledge around the perimeter where you plan to place plants or rocks. For a more natural look, consider incorporating shelves at different depths to accommodate various aquatic plants.
Step 5: Determining the Depth
The depth of your pond depends on its purpose and the types of aquatic life you want to support. A depth of at least 18 inches (45 cm) is recommended for fish to survive through winter in colder climates. If you plan to keep fish, make sure a portion of the pond is deeper (at least 3 feet or 90 cm) to provide a refuge during extreme temperatures.
Step 6: Slope the Sides
To prevent cave-ins and make it easier for wildlife to enter and exit the pond, slope the sides of the hole gradually. A slope of approximately 45 degrees is a good rule of thumb. Be mindful of safety while doing this; you don't want the sides to collapse while you're working.
Step 7: Remove Rocks and Debris
While digging, you may encounter rocks, roots, or other debris. Remove any sharp rocks that could puncture the pond liner later. Clear out any roots that might interfere with the liner or pose a risk to the pond's integrity.
Step 8: Check for Levelness
Periodically check the levelness of the pond's base and the depths you've created. Use a carpenter's level or a long straight board to ensure that the bottom of the pond is level and the shelves have a slight slope to prevent the accumulation of debris.
Step 9: Padding the Bottom
To protect the pond liner from sharp objects and potential punctures, add a layer of sand or place old carpet pieces on the bottom of the hole. This extra padding will provide a cushioning layer for the liner and help ensure its longevity.
Step 10: Positioning the Pond Liner
If you're using a preformed liner, carefully place it in the hole and make adjustments until it fits snugly into the excavated space. If you're using a flexible rubber liner, carefully unfold it and drape it over the pond, allowing it to conform to the contours of the hole. Be patient during this step, as positioning the liner correctly is crucial for a successful installation.
Gently place the pond liner in the hole and adjust it to fit the contours of the excavation. Ensure there are no wrinkles or folds in the liner. Let the excess liner extend beyond the edges of the pond temporarily.
Step 11: Trimming the Excess Liner
Once the pond is partially filled with water, trim the excess liner, leaving a few inches of overhang around the edges. This overhang will allow you to secure the liner in place later and prevent it from shifting.
Step 12: Add Water
Start filling the pond with water while adjusting the liner to fit the shape perfectly. As the water level rises, smooth out any wrinkles and press the liner against the shelves or ledges you created. Once the pond is about half full, trim the excess liner leaving a few inches of overhang.
Step 13: Choose the Right Pond Pump:
Before you start plumbing, make sure you have the right pond pump for your water feature. Consider the size of your pond, the flow rate required, and any additional features you plan to add, such as waterfalls or fountains. Ensure that the pump's power and flow rate match the needs of your specific pond design.
Step 14: Assemble Necessary Materials:
Gather all the materials you'll need for the plumbing process. This may include PVC tubing, PVC connectors (such as elbows, tees, and couplers), hose clamps, PVC cement, a hacksaw or pipe cutter, and a measuring tape.
Step 15: Determine the Pump Location:
Choose a suitable location for your pond pump. Ideally, it should be positioned at the deepest part of the pond to ensure efficient water circulation. You can place the pump directly on the pond floor or elevate it on a platform or bricks to prevent clogging with debris.
Step 16: Measure and Cut PVC Tubing:
Measure the distance from the pump to the point where the water will be returned to the pond, which could be a waterfall or a fountain. Cut the PVC tubing to the required length using a hacksaw or pipe cutter. Ensure the tubing is long enough to reach the desired destination with some extra length for adjustments.
Step 17: Connect the PVC Tubing:
Attach the PVC connectors, such as elbows or tees, to the ends of the PVC tubing to direct the water flow in the desired direction. Use PVC cement to secure the connections and create a watertight seal. Allow the cement to dry according to the manufacturer's instructions.
Step 18: Attach the Pond Pump:
With the PVC tubing and connectors in place, it's time to connect the pond pump to the tubing. Most pond pumps come with threaded outlets, which you can screw directly into the PVC connectors. Use hose clamps to secure the connection tightly.
Step 19: Install a Pond Filter:
To maintain water clarity and remove debris, it's essential to install a pond filter in the plumbing system. Connect the outlet of the pump to the input of the filter using more PVC tubing and connectors. Make sure the filter is properly positioned and securely fastened to prevent leaks.
Step 20: Set Up Waterfalls or Fountains (Optional):
If you plan to have waterfalls or fountains, connect additional PVC tubing to the outlet of the pond filter and route it to the desired locations. Depending on the design, you may need to use additional connectors or install a separate pump for the water feature.
Step 21: Check for Leaks:
Once the entire plumbing system is set up, fill the pond with water and turn on the pump to test the flow and check for leaks. Inspect all the connections, especially the PVC cemented joints, to ensure there are no water leaks. Fix any issues before proceeding.
Step 22: Bury or Conceal the Tubing:
For a more aesthetically pleasing appearance, bury or conceal the PVC tubing using rocks, gravel, or plants. Be cautious not to obstruct water flow or cover the pump's intake to maintain its efficiency.
Step 23: Maintain the Pump and Filter:
Regularly inspect and clean the pump and filter to ensure they are functioning optimally. Remove any debris or clogs that may hinder water flow. Follow the manufacturer's guidelines for maintenance and cleaning.
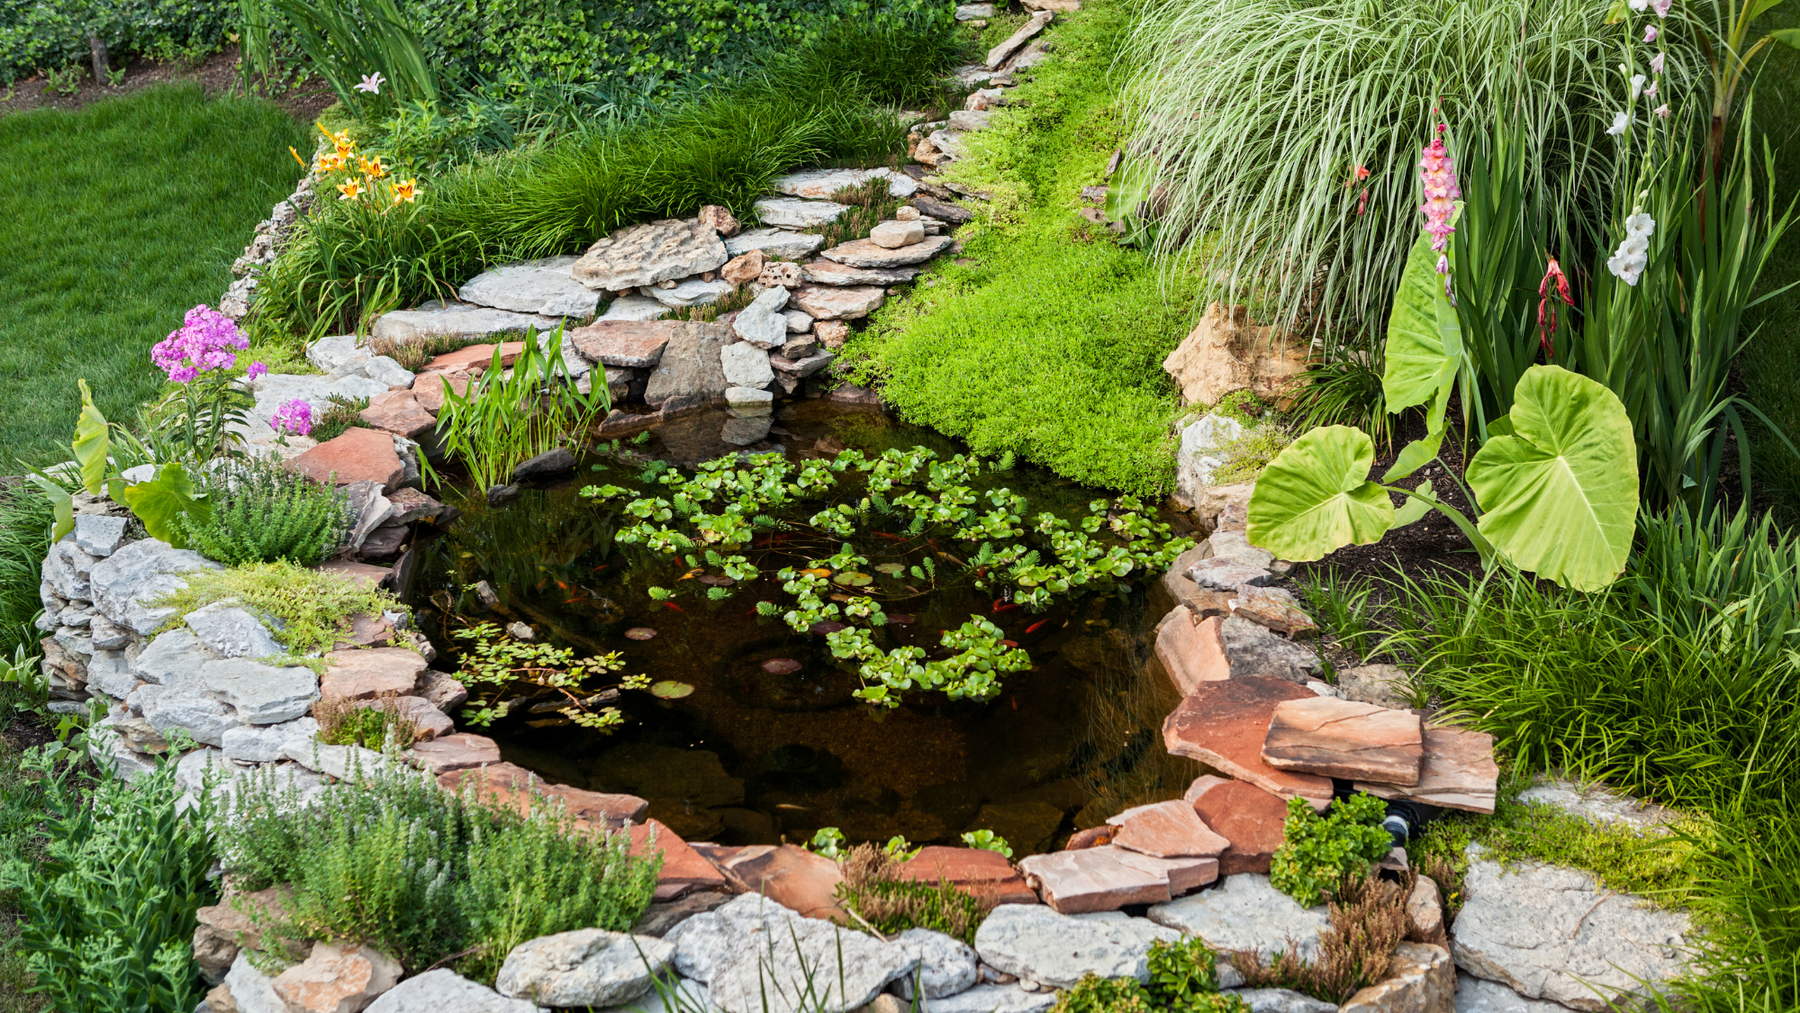
Step 24: Add Rocks and Decorations
Now it's time to add character to your pond! Arrange rocks and stones around the edges and shelves, creating a natural-looking border. You can also add water plants like water lilies, lotus, or submerged plants to enhance the pond's ecosystem and beauty.
Step 25: Fill the Pond Completely
Fill the pond to its desired water level, and let the pump and filter system run to circulate and filter the water. Check for any leaks and make adjustments as needed.
Step 26: Final Touches
With the pond up and running, take a step back and admire your creation. Make any final adjustments to the rocks, plants, and waterfall to achieve the perfect look.
Step 27: Maintenance
To keep your backyard water feature in top condition, perform regular maintenance. Clean the pump and filter regularly, remove debris, and check the water quality. Also, consider adding beneficial bacteria to maintain a healthy balance in the pond ecosystem.
If you’ve followed these directions, congratulations! You've successfully built your own backyard pond! Now, grab a chair, sit back, and enjoy the soothing sound of running water and the serenity it brings to your outdoor space.
Leave a comment